|
|
|
ORMS Blocks
Note: This topic applies to ORMS ADF11.
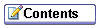
The Blocks Dashboard displays the groups that have made future reservations at the property for 'block reservations.' You can view block data on various graphs and select filters for report results. Additionally, you can link other blocks to be used as the forecast model for the current block, instead of the ones automatically selected by ORMS. You can also create custom patterns for forecasting the block, if you know the group will have various materialization levels for certain time periods and days of the week during the block reservation. Access the Blocks Dashboard by selecting ORMS>Blocks.
Note: Only Blocks that have a block status configured as Open for Pickup will display by default on this dashboard. To include blocks that currently have a status other than the ones that are Open for Pickup, the user will need to select the Incl. Inactive check box in the Filter section. (The status codes for blocks are defined as Open for Pickup in Opera Setup>Reservations>Business Blocks>Status Codes; while the status for a specific block reservation is assigned in the Opera business block header: Reservations>Blocks>Status).
The Graphs section gives a visual depiction of the block rooms for different types of data for the next 14 days (default) or the selected date range from the calendar. The different type of data that can be graphed and selected from the Graph For LOV includes:
You may select the type of graph you want displayed from the Graph Type LOV, either Line Graph or Bar Graph. The default is Line Graph for all blocks of a time span longer than three days. If the block is shorter than three days, the default will be the Bar Graph.
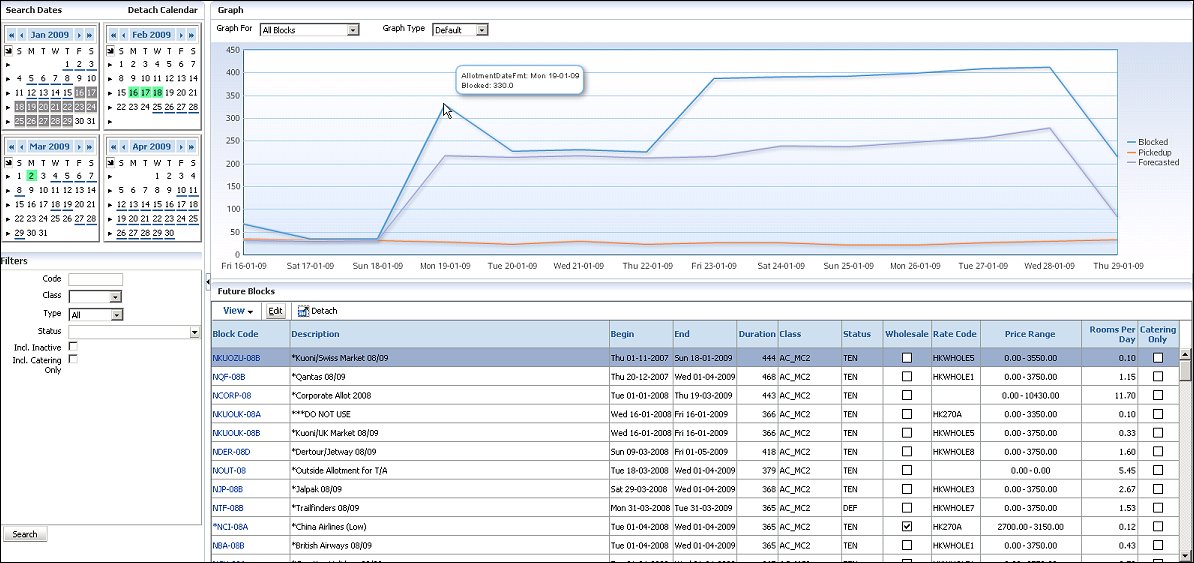
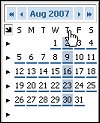
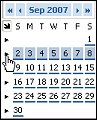
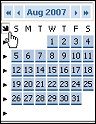
The calendar displays four months where you can select which dates you want for data to appear in the graphs and grids. When the dashboard first opens, the first month in the calendar grid is the current month, with the next three subsequent months displayed thereafter. You may select one date, multiple dates, or a date range for the displayed data.
Depending on the active dashboard, various dates are already highlighted as configured:
Note: Group Alerts is still under development and therefore Group Alerts are not available at this time.
If you want to display a different set of four months, click on the (back) << < or (forward) > >> arrows at the top of the selected calendar month. The double arrow moves the calendar back two or forward two months, respectively. The single arrow moves the calendar back or forward one month, respectively. All other calendar months in the grid appear in sequence.
![]()
Individual Days - To select one day, simply click the one day. For several individual days not in a sequence (i.e. Monday Wednesday, and Friday) use Ctrl and click the separate days.
Same Days of the Week for the Month - To select a specific day of the week for the entire month, for example all Thursdays, simply place the cursor at the top of the day of the week (i.e. T) and click. You can also use Crtl and select more than one day of the week for the entire month, for example, all Saturdays and Sundays.
Entire Week - To select the entire week, click the pointer for the appropriate week.
Entire Month - To select the entire month, click the arrow at the top of the month.
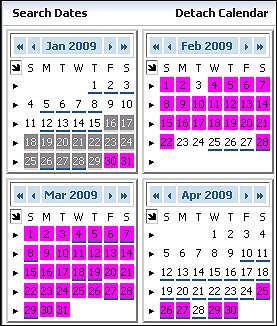
You can also expand the four-month calendar to a full 12-month calendar by selecting the Detach Calendar option. The detached, expanded calendar grid displays 12 months from which you can select dates. By default, the first month in the calendar grid is the current month, with the next 11 subsequent months.
Code. Enter the block code to filter the results.
Class. Select the drop down menu to select a block class to filter the results by.
Type. Select the drop down arrow to select a block type to filter the search results by. The options are: All (both normal blocks and wholesale), Blocks only, or Wholesale only.
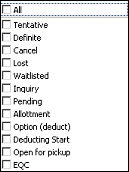
Status. Select a reservation status from the multi-select drop down menu to filter the results by one or more selections, such as by All, or Tentative, Definite, Cancel, and so on.
Incl. Inactive. Select this check box to include inactive blocks, as well as blocks that are not Open for Pickup yet.
Incl. Catering Only. Select this check box to only include blocks that are defined as 'Catering Only' on the Block Header in Opera and that have no rooms set up for them.
Search. Select to sort the block reservations based on the filter criteria entered.
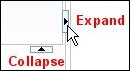
When you see the Expand and Collapse arrows on the dashboard, you can click on the arrow to expand or collapse that area of the screen, respectively.
View. Select View to display options for viewing the Future Blocks grid. Select or deselect the display options according to your preference. Once an item is selected or deselected, the screen will refresh with your selections displayed.
Detach. Select this button to expand the Future Blocks grid you wish to view. The expanded view will comprise the entire screen, eliminating other sections, so you can view the current grid singularly.
Block Code. A system-generated block code consisting of a combination of letters and numbers. The code is a unique sequence of characters identifying the Group Reservation.
Description. Displays a description of the allotment code. By default this description is the name of the Group Reservation.
Begin Date. Begin date of the group reservation.
End Date. End date of the group reservation.
Duration. Duration of the block in days.
Class. The Allotment Class for this block.
Status. Displays the Block Status of the block.
Wholesale. This is a read-only check box indicating if the block is a Wholesale Block.
Rate Code. Rate code used on the Block Header in Opera.
Price Range. Price range associated with this block.
Rooms Per Day. Average number of rooms per day for the duration of the block.
Catering Only. This is a read-only check box that when checked, indicates the block is a ‘Catering Only’ block.
Edit. Select this button to open the Forecast Pattern Screen (see below) for the highlighted Block Code.
Access this screen by highlighting the desired Block Code and either clicking on the Block Code or selecting the Edit button.
The Forecast Pattern displays two tabs: Block Links and Custom Pattern.
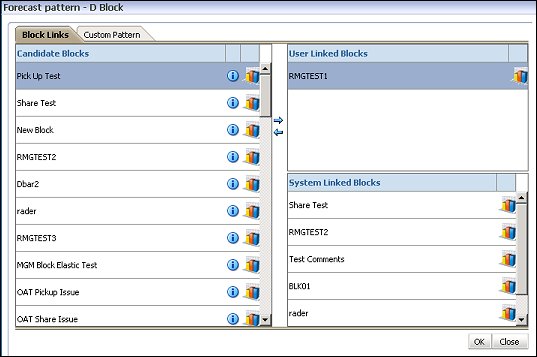
This tab contains Candidate Blocks, User Linked Blocks, and System Linked Blocks sections. Linked Blocks are models that will be used for predicting group materialization for the current Block. This grid lets you view graphs and statistics comparing:
Note: When a Block has no linked blocks assigned, no Materialization will take place for that block.
Note: When Custom Forecast Patterns are defined for a block, the Linked Blocks functionality is not used for those dates that have been set up with a Custom Forecast Pattern.
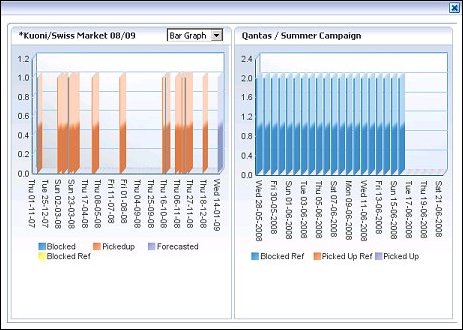
These graphs compare the current block with the selected one in the Block Links tab regarding Blocked, PickedUp, and Forecasted.
Note: When Custom Forecast Patterns are defined for a block, the Linked Blocks functionality is not used for those dates that have been set up with a Custom Forecast Pattern.
The custom Forecast Pattern allows the user to define a specific forecast pattern for certain time periods and days of week for a specific block. This comes in handy, for example, when there are convention groups booked. The setup team may arrive for the first and second day, the group contact people arrive as of day 2, the main delegates only as of day 3, and then the setup team arrives again on the second to the last day of the group block. From experience, the Revenue Manager might know that usually about 75% of the Setup team shows up for day 1 and 2. However, only around 65% of the delegates and for the cutback, the team speeds up and tends to finish a day early. Therefore, the last day will only be utilized by approximately 5% of those originally booked. This can all be set up and the forecast will take these patterns into consideration, overruling the pattern given by the linked blocks.
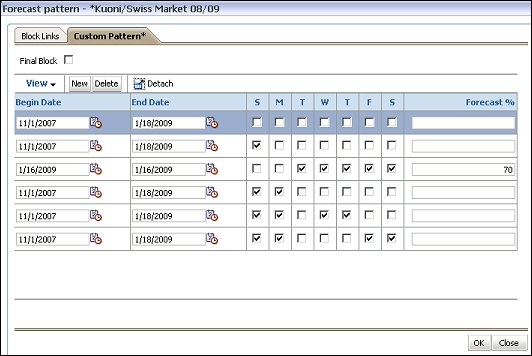
You can edit an existing pattern by selecting it and modifying the dates, days of the week, and forecast percentage.
Final Block. Select this check box to mark the ‘Final Block’ flag on the Block Header in Opera. (This check box is visible when the OPO_<version number> RMS license code is active and applies to both regular blocks and wholesale blocks. Select this check box to identify this block and its number of rooms actually sold as the number of rooms that ORMS will use for forecasting. This can be calculated before the cutoff date has been reached (see Business Block Rooms Tab) and on the cutoff date. In both cases, the forecasts take into account the rooms actually sold and those rooms that were released to other inventory. If this check box is not selected, then ORMS uses only the original sold block for the forecast and does not include the final amount of actual sold and picked up rooms.)
Begin Date. Enter the start date of the forecast pattern (within the date range of the reservation block).
End Date. Enter the last date of the forecast pattern (within the date range of the reservation block).
DOW. Select the days of the week that will be affected by this pattern.
Forecast %. Enter the percentage of occupancy for the dates and days selected for this forecast pattern.
View. Select View to display options for viewing the Custom Pattern tab. On the list of options, select or deselect the display options according to your preference. Once an item is selected or deselected, the screen will refresh with your selections displayed.
Detach. Select this button to expand the Custom Pattern screen. The expanded view will comprise the entire screen, eliminating other sections, so you can view the current grid singularly.