Scopes
Sales information can be provided on company, travel agent, source, and contact Profile screens, primarily on the Sales Info tab. This information can assist Sales Managers in decision-making and can be used as filters in preparing sales reports.
A scope indicates the region where a contact or account's business originates. Many accounts and contacts do not draw their business locally, but rather from another city, region, or even another country. Define scopes as regions or areas that are as specific or general as necessary. Select System Configuration>Profile>Sales Information>Scopes to set up sales scopes. The Scopes screen appears.

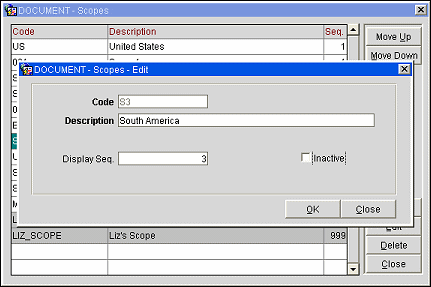
The Scopes screen shows the following information.
Code. Code that represents the scope.
Description. Description of the scope code.
Seq. Number that controls the position of the scope in displays.
To create a new scope, select the New button from the Scopes screen. To modify an existing scope, highlight your choice on the Scopes screen and select the Edit button. The Scopes - New or Scopes - Edit screen appears.
Provide the following information and select the OK button.
Code. Enter a code for the scope (for example, UK for the United Kingdom, EUR for Europe, etc.).
Description. Enter a description for the scope code.
Display Seq. Enter a number that will control the position of this scope when listed in screen displays. Scopes that do not have a display sequence number appear in alphabetical order following the scopes that have a sequence number assigned.
Inactive. Select this checkbox to inactivate the selected scope code. Leave unchecked for active codes. Inactive codes will not be available for selection on a profile, but will be available for selection in filters and queries.
See Also