When the OPR<version number>ORS and OPI <version number> OCIS license codes are active, you can export ORS/OCIS membership data for various purposes, depending upon your needs. You can also export membership statements to a data file so they can be sent to a fulfillment house. Access the file export utility from within ORS/OCIS by selecting Miscellaneous>File Export.
The file export options are:
- General. Select General when you want to export data that is commonly used from existing templates within ORS/OCIS. The Export File List appears. The files having templates are listed in a grid from which you can select. These export files are pre-configured and can be modified if necessary. You can also create your own customized export parameters from this option by selecting New on the Export File List screen. For more information on exporting general files (both PMS and ORS/OCIS), refer to Export Files.
- Membership Export. Select Membership Export when you want to export data related to ORS/OCIS memberships, membership points, and membership statements. See Exporting Membership Statements below. For more detailed information on other membership exports (both PMS and ORS/OCIS), see Membership Export.
Exporting ORS/OCIS Membership Statements
Exporting membership statements to a data file so they can be sent to a fulfillment house is a common task. You can select the file type you want to export and the view for the export. To access the file export feature, select Miscellaneous>File Export>Membership Export. The Export File List screen appears.
Export File List Screen

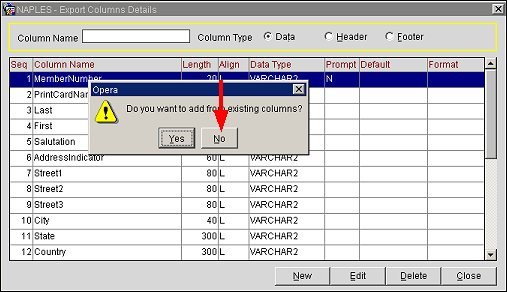
At the Export File screen, select the New button. A prompt appears asking you if you want to add from the export template. Select the No button, as you are going to set up your own export details in the following steps.
After selecting No, the Export File Details screen appears.
Export File Details Screen
At this screen, you select the source of your export files and other conditions.
Selection Criteria
Required Fields:
File Type. Enter a new file name and type for the export.
File Description. Enter a long description of the file type; one that is meaningful to you.
Export Source. Select the down arrow to display a list of the available views for the export procedure. The two provided choices for exporting membership statements are:
Filter Condition. This text box is for entering the condition for the export. By default, all data will be exported. In this case, users typically only want to export one batch at a time. Type the batch number of the statements you want to export in a "where clause." For example, if you want to export the selected statement information for Batch Id 33 (as displayed on the Membership Statements screen), you will type: statement_batch_id=33
Buttons
Export Columns. Select this button (when it is visible) to display the Export Columns Detail screen where you can select the columns to appear on the export.
OK. Select this button to save your entires. Your filename appears on the Export File List screen. At the Export File List screen, highlight the filename and select the Generate Button to export statement data.
Centrally Managed Memberships
Membership award points and membership transactions for centrally managed membership programs, associated with central membership types (Setup>Configuration>Profile>Memberships>New or Edit>Points Managed/Central), can be exported to a statement. Membership award points for centrally managed membership programs provide frequent flyer membership types to be exported and sent to airlines (third-party use).
- Three templates are included for central OCIS membership award points and transactions export.
- The templates can be used as-is or can be modified and renamed according to your needs.
- These templates export positive award points, unless the filter command is deleted by the user (which will then allow negative points to be included).
The three templates (File Types) for centrally managed export files are:
- OCIS_ALASKA (OCIS Alaska Airline) - This template is for the transaction level. It identifies bonus points (column contains FORMULA of H5B). One transaction appears per line. Provides the view of MEMBER_STATEMENT_EXP_TRX_VW.
- OCIS_AMERICAN (OCIS American Airline) - This template is for the transaction level. One transaction appears per line. It provides the view of MEMBER_STATEMENT_EXP_TRX_VW.
- OCIS_DL_EXP (OCIS DL Export) - This template is for the membership level. It combines the total accumulated points on one line (for all transactions for one member). Provides the view of MEMBER_STATEMENT_EXP_MEM_VW.
To process the centrally managed statements at the Membership Statements screen (Membership>Statements):
- Select the centrally managed membership type from the new Mem.Type LOV for which the statement is to be run.
- Process the statement as you normally would.
- After the statement batch is processed and complete, go to Miscellaneous>File Export>Membership Export to export the statement. The Export File List appears. The entire ORS properties and configured templates will appear in the list (no need to select a property).
- If you want to modify an existing OCIS template, select the Copy button, make changes to a new template, and rename it.
- Highlight the File Type template to be used for the export file: OCIS_Alaska, OCIS_American, or OCIS_DL_EXP.
- At the Export File List, select the Generate button. The Export File screen appears. At the Export File screen, enter the Batch Id and select the Generate button.
Configuring a Membership Export in ORS/OCIS
To configure a membership data export in ORS/OCIS, follow the steps below:
- In ORS/OCIS, set up the membership exports by selecting Miscellaneous>File Export>Membership Export. The Export File List screen opens.
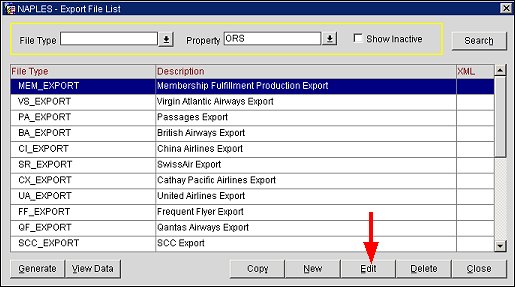
- On the Export File List screen, highlight MEM_EXPORT and select Edit. The Export File Details screen opens.
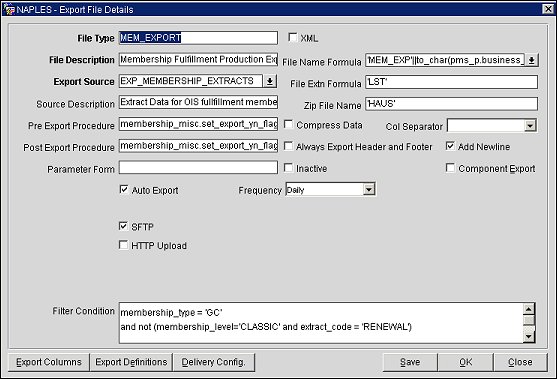
- On the Export File Details screen, enter the following procedures for the export procedure fields:
- Pre Export Procedure: membership_misc.set_export_yn_flag('Y')
- Post Export Procedure: membership_misc.set_export_yn_flag('N')
- Add a new export formula column by selecting Export Columns>New. When prompted to add from existing columns, select No. The Export Columns Details-Add screen opens.
- On the Export Columns Details-Add screen, in the Column Name field, name the new column as appropriate and enter the following formula for the Formula field:
- membership_misc.set_extract_det(extract_id)
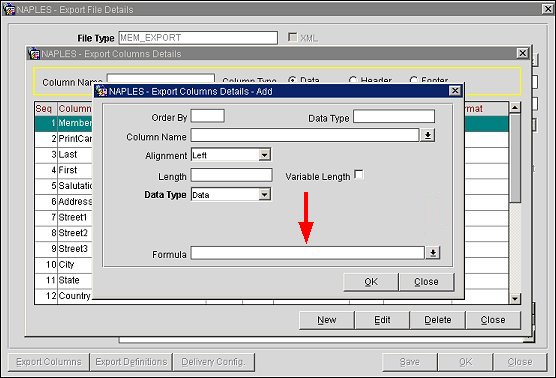
- Complete the remaining fields on the Export Columns Details-Add screen and select OK.
- On the Export Columns Details screen, highlight the existing EXPIRATION_DATE column from the exported columns grid and select Delete.
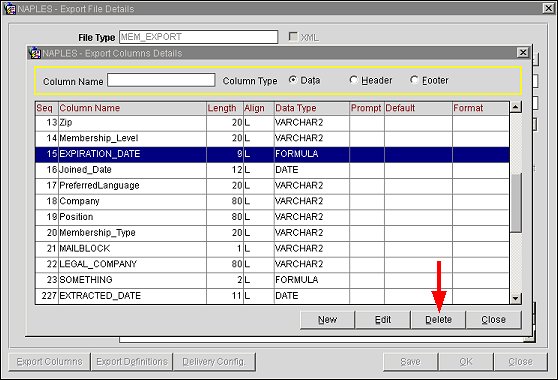
- Repeating steps 4-6 above, re-create this column as a formula by using the following formula:
- decode(membership_level,'LEVEL',NULL,to_char(EXPIRATION_DATE,'MM/YYYY'))
Note: "LEVEL" in the above formula is only a place holder and should be replaced with the name of a membership level that is used within your organization.
- Under the Column Name field, enter "EXPIRATION_DATE" for the column name
- Close out of all screens until you are back at the Export File List screen. Highlight the MEM_EXPORT file type and select Generate.

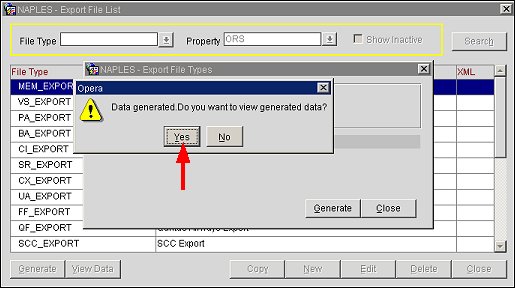
- On the Export File Types screen, select Generate to run the export.
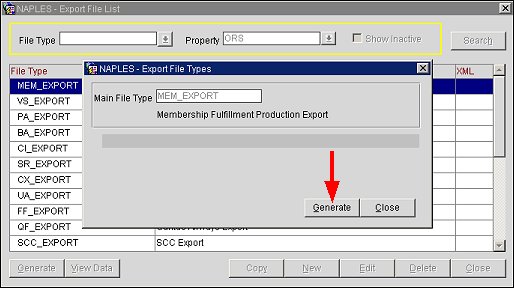
Tip: To view the generated data, answer Yes to the prompt that will display after the export is finished.