
|
|
|
CRO Configuration
Select System Configuration>Property>CRO Configuration to display the CRO Configuration screen. This command is available only if the OPR <version number> Opera ORS license code is active. From this screen you can search for existing central reservation offices (CROs), set up new CROs, and edit existing CROs.
CRO Code. By default, all CROs are listed. To find a specific CRO, select the down arrow to choose a CRO code from the list or type in an existing CRO code. Select the Search button.
CRO Code. Code assigned to this CRO.
Name. Full name of the CRO.
City. Marketing city for the CRO.
State. State where this CRO is located, or which it serves.
Country. Country where this CRO is located, or which it serves.
Postal Code. The postal code associated with the country and state for the CRO.
New. Select New to configure a new CRO with the information you want displayed in ORS. The Configuration screen appears where you enter a new CRO code and information. See Multi Property and CRO Setup.
Delete. Select Delete to delete the CRO and CRO configuration permanently from the database. This button is disabled if the user does not have the proper permission. Only users with the permission Property Config Group>CRO DELETE - Delete CRO can delete the CRO. Two messages appear before the CRO is deleted:
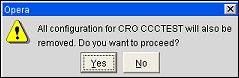
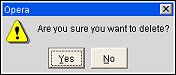
Warning: Removing a CRO from the system is very risky. All configured SID data for the CRO will be removed from the database. Please carefully consider the implications before deleting a CRO and ensure that the proper supervisory personnel are involved.
Edit. Highlight an existing CRO and select Edit to edit the CRO and its displayed information. The Configuration screen appears. See Multi Property and CRO Setup.
See Also